Only two parts remained to finish for Rydia's sleeves:
Incorporate gold-colored string ties for the upper arm
Add the starry details
For the upper arm tie, I decided to use gold eyelets and weave a thin rope through the openings. I bought one of those multi-dial eyelet crimper tools. The tool itself worked nicely. The tool in the hands of yours truly, however, ran into a small snag along the way. The multi-tool ended up being too handy for me... when the gadget is squeezed shut, it has three different (simultaneous) uses: 1) make a 1/8 inch width hole in your fabric, 2) make a 3/16 inch hole, and 3) crimps eyelets shut. Yours truly was trying to do #1 and had the fabric all bunched up in my hand, so I actually did #1 where the eyelet was intended to go (hooray!) and inadvertently made a small hole with #2 in the sleeve (doh!).
As for the stars, I thought embroidery would look the best. But, there are a lot of stars, and...
...so I listened to my husband (for once) and went with his suggestion to try airbrushing instead. By making star-shaped stencils and using airbrush fabric paint, I was able to get crisp edges and vibrant color without having any nasty paintstroke lines. I wish I had bothered with airbrushing around the sleeve opening, as that did have paintstroke lines. It was actually kind of fun to use and gives a great result (with a little bit of patience to figure out how to spray evenly). At least, it was fun for the first couple stars. After that, it was downright tedious. There are about two dozen stars on one side of the sleeve. With two sleeves and two sides each, we're talking roughly 100 stars to airbrush!
A word of advice: use a hairdryer on a low heat setting to expedite the drying time for airbrushed paint. Also, music and/or mindless tv shows on Netflix help to pass the time.
So, about those intentions to blog concurrently with costume design...blogging definitely fell by the wayside. There were a couple months where I had to take a hiatus and figured if I only had time to do one or the other, costume should come first. As of today, I can officially say that it is finished with a week still to go before ConnectiCon. Woohoo! It's definitely a great feeling to have seen this process the whole way through. Now, time to start sharing the rest of the process with you! Some of the posts were drafted back in January/February and simply never published until now, like this next part about the sleeves...
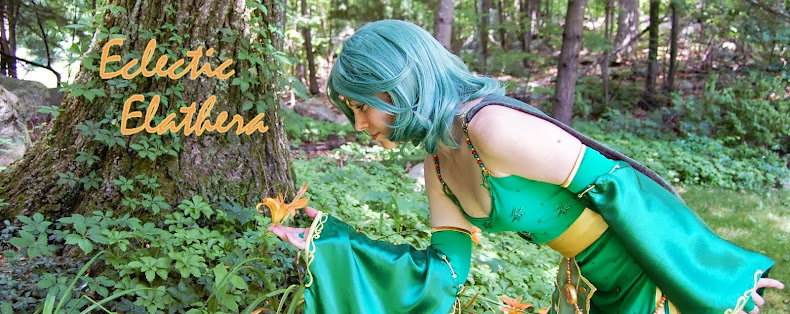
Sleeves are starting to take form! At this point there are only a few finishing touches left to make, but I can't help give a sneak preview. Again, this took me far longer than expected...I was hoping to spend perhaps 3 to 4 weeks tops to completely finish this piece. In reality, it has taken me almost 6 weeks. It's hard to stay motivated when ConnectiCon seems so far away.
Here are a few handy tips for how to get yourself back on track and to stay motivated: 1. Plan ahead how much time you will need to complete your project. If you set milestones along the way, you'll gravitate toward trying to meet your self-imposed deadlines. 2. If there is a craftsman competition, register! It will put the pressure on you to fully commit to your project. (Be sure to register way in advance, as spots fill up quickly!)
It was not easy to sew the yellow boarder around the sleeve opening. First, I sewed the outer edge the length of the green fabric to eliminate raw edges. Then, I carefully pinned the yellow strip to the midpoint of the sleeve (with raw edges ironed and pressed underneath). The hardest part was ensuring the strip length was even on both the exterior and interior of the sleeve. I used a shorter stitch length when putting it all together.
The next step was to put a yellow/gold trim around the edge. I traced a pattern in paper and transferred it into the cloth using pastel pencil, and then carefully hand painted the design. The pastel transfer pre-painting is just visible below. I was not very impressed with the quality of the paint job, but it looks ok from a distance.
I first began my journey on what looks to be the easiest part of Rydia's outfit: her long, flowing sleeves. When you boil it down, there really is not much to them, yet somehow they still manage to take an inordinate amount of time.
Part of the snag I ran into was how to get the yellow border around the opening while still effectively hiding the inner seams. I decided to do a test run with some scrap fabric and hand-sewed it to get a feel...
Practice attempt did not go as well as planned. Originally, I was going to give French seams a shot --- this would hide the seams on both the outside and inside edges. However, my mind simply cannot wrap itself around how to do that when working with one continuous piece of cloth.
I took custom measurements based on my 5' 6" height to develop a pattern for the sleeves. It looks like the point on each sleeve hangs just below Rydia's knee when her arm is out straight, and falls below her knee when her arm is folded. I used tissue paper to make the pattern (for best results, iron or flatten prior to making a pattern). Here you can see the work in progress with the yellow trim around the sleeve opening:
It's a slippery material. This is good because it will help the sleeves to "flow" nicely. But, it makes it darn tricky to sew. I've tried working with slippery fabrics before with lots of frustration and mixed results. This time I am [hopefully] coming at this more prepared. I found a helpful video that provides some tips on working with slippery fabric. It was incredibly helpful! I never eealized before that all those different dials on the sewing machine had a real purpose.
Lesson learned: for sewing slippery fabrics, use a lower tension setting, smaller needle, and shorter stitch length.


