Monday, January 6, 2014

Pony Craftsmanship Level +1

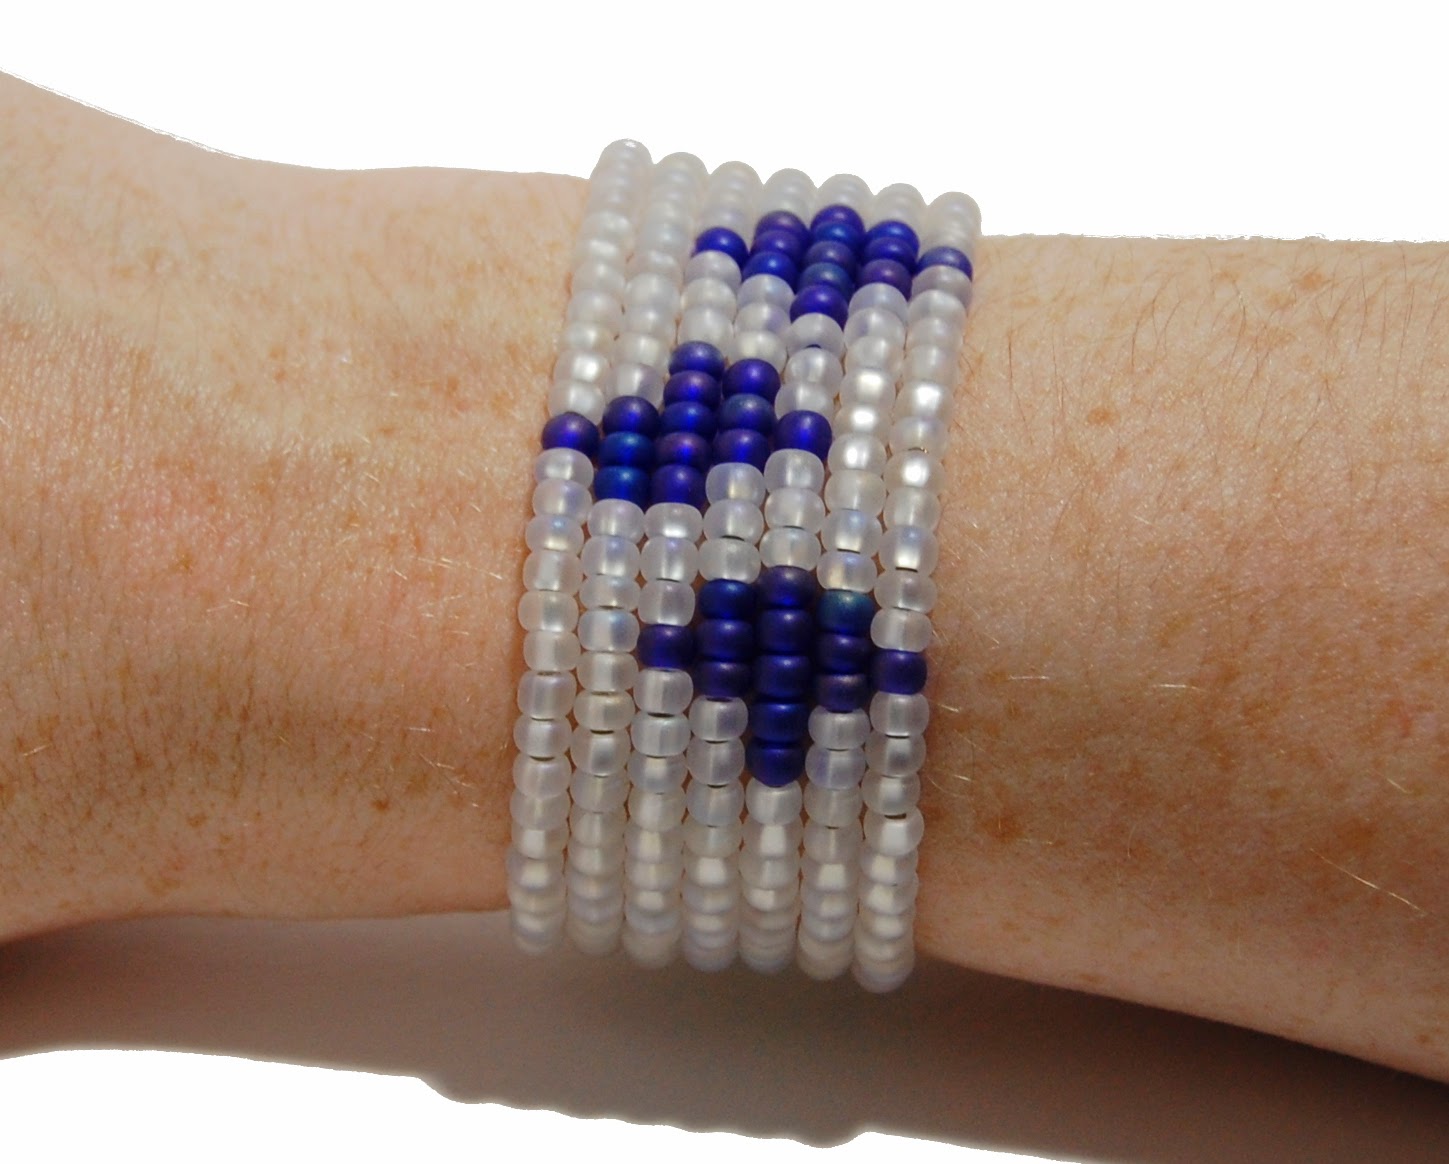
I've decided to branch out in my artistic endeavors and share my love of all things cosplay, crafty, and geeky in a more broad way.  For several years now I've held this dream to open a shop on Etsy.  And, last month, I have finally made that dream into reality!  My focus is on silhouette and paper art (at least to start).  And, I put together a few My Little Pony cosplay accessories after making a few improvements to my Rainbow Dash costume.

Here's a couple photos for you to enjoy!

My Little Pony - Pinkie Pie cosplay bracelets

Pinkie Pie Party Cannon - 3-D Shadow box art with quilled and curlique confetti

More 3-D Shadow box art!  This time it's MLP sisters Princess Luna and Princess Celestia!

My Little Pony - Rainbow Dash cosplay bracelets

My Little Pony - Rarity diamond cutie mark bracelet
 

Monday, September 16, 2013

Rainbow Dash Cosplay Photoshoot with Splinters of Light Photography

Late last month I went to a cosplay photoshoot with my freshly repaired Rainbow Dash cosplay at a nearby park in Connecticut.  Despite feeling totally socially awkward when walking by myself, I had a really nice time.  I want to give a special shoutout to the photographer that orchestrated the event and somehow works magic behind that lens and comes up with interesting poses (and brings the magic of friendship with her wherever she goes!)

While she is finishing up editing photos from the multitude of shoots over the past couple months, here is a fantastic unedited photo from the session.  You should check our her Facebook page: Splinters of Light Photography and give it a like (and maybe book a shoot)!

I have also decided to start my own Facebook page to chronicle my cosplay, craft, and cooking experiences.  I find it to be a more interactive format than a blog.  Somehow blogging feels very one-sided, almost like having an open diary.  I invite you to share in my creative journey!  Please show your support by liking Eclectic Elathera on Facebook.  I would be happy to answer any questions you have on my page!

Rainbow Dash cosplay just got 20% cooler
20% cooler photo because it was taken by Splinters of Light Photography

Tuesday, August 27, 2013

Rainbow Dash cosplay repairs


My very first cosplay needs some love before it can be dusted off again.  My friends Ayla of Antipode Geek Belly Dance and Glitterforge wanted to do a group cosplay for ConnectiCon 2012.  We decided to go as characters from My Little Pony.  Glitterforge went as Shining Armor, Ayla as Twilight Sparkle, and I went as Rainbow Dash.  Merika, Ayla's sister (and a domo), made us these fantastic cloaks with our cutie marks!  So totally awesome!

MLP My Little Pony cutie mark cloaks made by Merika of Antipode
Cutie Mark cloaks made by Merika!

Having not worn the cosplay since then, all the stuff was thrown on a shelf after last year's convention.  Literally.  Was not even thrown in the wash (I know, right? Eww).

Does washing count as costume repair?  Probably not.  Hygienic, yes.  I didn't plan too terribly well on making this easy to wash.  The wings were sewn directly onto the hoodie.  I had to cut all the stitches to stick into the wash. 

MLP Rainbow Dash cosplay wings made by Elathera
Rainbow Dash wings - with cute visible stitching around the edges


As for the skirt, my concern here was that the cutie mark colors would bleed.  The cutie mark was made from felt, and the bottom (blue) layer hand-sewn onto the skirt. The yellow and red lightning bolts as well as the white cloud were tacked on with Elmer's adhesive spray.  I got lazy and only removed the bolts and clouds before washing and seemed to have no issues (phew!).

I also picked up a pair of butt shorts months ago for this cosplay (and am still working up the courage to wear them publicly).  I made even tinier felt cutie marks for the shorts --- and let me tell you, it is darn hard to cut things that small when your scissors are dull!

MLP Rainbow Dash cosplay jean skirt and butt shorts with cutie mark by Elathera
Cutie mark skirt and shorts after washing and repairs

I left the wig repairs until last.  After 2 days of con wear, the poor thing has lost some of its shape, especially toward the "roots".  Wigs are definitely a struggle point for me... I ran into similar issues on my Rydia costume.  Totally open to suggestions if anyone out there has some good advice! 

MLP Rainbow Dash cosplay wig purchased from Amazon styled by Elathera
Rainbow Dash cosplay wig - before and after styling


Tuesday, August 20, 2013

Stuffed Chicken with Gorgonzola Cheese, Bacon, and Garlic Chives

As a new homeowner last year, I was super excited for Spring to come around.  I had these grand plans to have a fabulous vegetable garden and to grow all kinds of flowers and herbs.  Well, reality did set in---my intentions were way to ambitious.  

I did make an honest attempt toward growing some vegetables and herbs on the deck in planter boxes.  The vegetables were a disaster, though.  In my greed for fresh noms, I overcrowded what was planted and overwatered (be careful when growing plants in boxes to allow for adequate soil drainage).

Thankfully, the herbs came out all right!  We made heavy use of cilantro for fresh salsa, dill for potato salad, and mint for mojitos.  What stumped me was how to use the fresh garlic chives --- yes, read that correctly: garlic chives --- to make a super tasty meal.  I stumbled upon a recipe for stuffed pork chops with chives, bacon, and blue cheese and thought it sounded amazing.  I gave it a try with chicken and gorgonzola instead.  It is absolutely delicious (and goes well with chardonnay, to boot!).

This was my first experience stuffing meat... making stuffed meat... ahh cannot unthink how dirty that sounds.  Anyway, I am very lazy when it comes to cooking.  The last time I made the recipe, I used thin sliced chicken breasts instead, which meant not having to slice open a pocket in the meat.
 
Ingredients for Stuffed Chicken: precooked bacon, gorgonzola cheese, and garlic chives
Ingredients for stuffing

Stuffed Chicken with Gorgonzola Cheese, Bacon, and Garlic Chives
Modified from Blue Cheese, Bacon, and Chive Stuffed Pork Chops

Makes 2.5 servings


Ingredients

  • 1 lb thinly sliced chicken breast
  • 4 oz Gorgonzola cheese
  • 3 slices precooked bacon
  • 1.5 tbsp. chopped fresh garlic chives
  • olive oil
  • salt to taste (I used garlic salt)
  • pepper to taste

Directions
  1. Preheat oven to 350 degrees.
  2. Combine cheese, bacon, and chives in a bowl. Divide into small balls, one for each set of chicken slices.  Place each ball in between two slices of chicken.  Use toothpicks to seal, if necessary.
  3. Lightly oil outside of chicken slices.  Season with salt and pepper to taste.  Keep in mind that the cheese will be salty.
  4. Bake ~30 minutes, until the stuffing is hot and chicken is cooked.  Remove toothpicks and serve.

I recommend using a broiler pan with aluminum foil to catch any drips, which will prevent the chicken from sitting in its own juices. 

Stuffed Chicken with Bacon, Gorgonzola Cheese, and fresh Garlic Chives by Elathera
Stuffed Chicken with fresh garlic chives and bacon garnish


Tuesday, August 13, 2013

Pysanky (Ukrainian Eggs) with Electric Kistka

So, like other art forms, I discarded pysanky for a few years before coming back to it again.  After doing some research online, I discovered the electric stylus and made an impulse purchase.  The electric stylus has a much more even flow because the beeswax is melted at the optimal, even temperature.  Plus, it came with interchangeable tips that had extremely fine points.  You can see the difference in the amount of detail (this is totally a change in stylus and nothing to do with skill...I am still very much a beginner at making pysanky).  It takes about 10-12 hours to make one of these on a normal chicken egg.
geometric yellow orange red black pysanky Ukrainian egg with electric kistka

Geometric pysanky made with an electric kistka

While it is intricate and detailed, I'm not too terribly happy with how the egg above came out.  The design is lackluster and the choice of color is not terribly inspiring.  But, you can clearly see how geometric designs can be constructed on an egg.

The egg below is far better in my opinion.  It has a nice color combination and intriguing design.  To help keep the hollow egg upright (yes, it has not broken yet!!), I used a funnel to put a little bit of sand inside and glued the bottom hole shut.  The sand gives it some weight.
floral flower yellow gold red maroon purple pysanky Ukrainian egg with electric kistka
Floral pysanky made with an electric kistka

Thursday, August 8, 2013

Rydia cosplay photoshoot

A big shout out to Kiratsukai of Splinters of Light Photography for the awesome photos and editing work!  I would have been a hopeless, lost mess without you putting me into various poses.  Be sure to check her out if you cosplay in the New York, Connecticut, and/or Massachusetts areas.


Rydia from Final Fantasy 4 cosplay at CT Con 2013 designed by Elathera photo by Kiratsukai

Rydia of Mist from FFIV cosplay costume designed by Elathera photography by Kiratsukai
This one is my favorite!
 
shy smile Rydia from Final Fantasy IV cosplay costume designed by Elathera photography by Kiratsukai
A close second...


Rydia from Final Fantasy IV cosplay at ConnectiCon 2013 designed by Elathera photo by Kiratsukai
Side view of sleeves...can you believe there's a purse inside one of them?!

Rydia from FF4 cosplay at CTCon designed by Elathera photo by Kiratsukai

Rydia of Mist from FFIV cosplay at CTCon designed by Elathera photo by Kiratsukai

Rydia of Mist from Final Fantasy IV designed by Elathera photo by Kiratsukai

Rydia of Mist from FF4 cosplay designed by Elathera photography by Kiratsukai

Sunday, August 4, 2013

Easy Chicken & Black Bean Enchilada Casserole

We love the heck out of tortilla chips in this house...tortilla chips with salsa, chips with sour cream, chips with bean dip, chips and cheese... you name it!  And thanks to Moe's restaurant chain, I fell in love with their green tomatillo salsa.  We have tried several different store brands to capture the same taste.  None can quite compare, but the closest we have found is Herdez brand Green Salsa.  For a party this past weekend, I decided to change up my favorite chicken enchilada recipe by adding this amazing salsa into the mix.  This variation has a phenomenal flavor and quickly became my new favorite---and was so simple to make!
finished Easy Chicken and Black Bean Enchilada Casserole with Green Tomatillo Salsa
Chicken & Black Bean Enchilada Casserole

ingredients for Easy Chicken and Black Bean Enchilada Casserole with Green Tomatillo Salsa
Casserole ingredients except the sour cream


Easy Chicken and Black Bean Enchilada Casserole with Green Tomatillo Salsa
Modified from Chicken Enchilada Casserole II

Makes 12 servings


Ingredients

  • 16 oz container sour cream
  • 16 oz jar Herdez green salsa
  • 16 oz (2 cans) black beans, drained
  • 30 oz canned chicken, drained
  • 5 (12 inch) flour tortillas or burrito shells
  • 4 cups cheddar cheese 
  • (optional) Onion powder to taste
  • (optional) Garlic powder to taste

Directions
  1. Preheat oven to 350 degrees.
  2. Combine salsa, sour cream, and spices together in a bowl. Set aside.
  3. In a separate bowl, shred the chicken with a fork.  Stir in black beans.
  4. Tear tortilla shells into strips.
  5. Layer the bottom of a 13x9 baking pan with 1/3 tortilla strips.  Top with 1/3 chicken and bean mixture, 1/3 sour cream mixture, and 1/3 cheese.  Repeat layering with remaining ingredients. 
  6. Bake 20 to 30 minutes, or until golden and bubbly.
  7. Let stand 10 minutes and then serve.

Leftovers make for a tasty dip with tortilla chips!  That is, I mean, if you happen to have leftovers...which would never happen because this is so amazingly delicious.  Why do I feel so full? 

Saturday, August 3, 2013

Pysanky (Ukrainian Eggs) with Regular Kistka

I go through phases with arts and crafts.  A medium will be super shiny to me for a couple months and then I won't pick it up again for several years.  Pysanky is a good example.  It is a fascinating and beautiful art form.  Part of its beauty lies in the delicate nature of the medium itself: a hollowed out eggshell.  That's right, an egg!

Pysanky, also known as Ukrainian eggs, have religious meaning and Christian symbols woven into the design.  I am not a religious person myself and can still appreciate the delicate art.

My family bought me the necessary equipment as a Christmas present (that's right, not for Easter!) while in college: dyes, beeswax, and a stylus.  How does it all work?  The dyes are straightforward...mixed with water and vinegar, just like you would do for dyeing Easter eggs.  In order to make different colors and designs, beeswax is applied to the egg using your stylus (kistka).  Each stylus may have a different size tip.  The larger the tip, the bigger the flow of wax.  This is what a stylus looks like:
You place a little bit of beeswax into the receptacle and melt carefully over a candle.  It needs to be hot enough to melt the wax, but not so close to the flame that you burn the wax.  Every area that is coated in beeswax will retain the underlying color.  You dip the egg in dyes from dark to light (yellow, orange, red, green, etc) and apply wax after each dipping.  Then all the wax is melted off and you are left with a beautiful, fragile design.  Personally, I found the results with these styluses to be frustrating.  It was hard to apply lines evenly to the egg, and the tube would often get clogged.  This was about as detailed as I could get...


purple gold yellow blue pysanky ukrainian egg non-electric kistka stylus
Pysanky made with a regular (non-electric) kistka
I tried a few "for fun" designs for friends, including Penn State eggs for graduation.  They made it all the way to State College safely, and then I tragically dropped the carton of them upon arriving at campus (doh!).  Also attempted to make chocobo from Chocobo's Magic Picture Book.  For some reason, the orange dye just did not want to take...disappointment.
psu penn state pysanky ukrainian egg
Penn State Pysanky
chocobo magic picture book pysanky ukrainian egg
Chocobo...wark!
The LearnPysanky website was a helpful resource to understand the basics.

Friday, July 26, 2013

Time for Yum! Mini chocolate pudding cakes

So, we have this dessert competition every year at work.  Every year I have entered,  and every year walk away empty handed.  Well, now all of that is about to change!  Maybe...

This year I put the dessert to vote and asked which folks would like best:
  • Lemon cake with cardamom icing and pistachio garnish
  • Banana cream tarts with sweet cream, fresh banana, and ground walnuts
  • Chocolate pudding cake with whip cream, topped with raspberry and chocolate shavings
The chocolate pudding cake was voted the winner by a large margin.  The polled audience was a good indicator for the competition, as I walked away with 2nd place out of 9 total desserts---hooray!  Because there are a number of dessert entries that folks consume, we do a "taste" format where everything is bite size.  I tried to find a recipe online for mini chocolate pudding cakes and did not have luck.  Instead, I ended up using a molten chocolate cake recipe (one that specifically called for chocolate bars instead of cocoa powder) and modified the bake time for mini muffin-sized portions.  And here they are...
Mini molten chocolate cakes with whip cream and raspberry
Assembled Mini Chocolate Pudding Cakes
Mini molten chocolate pudding cakes with whip cream and raspberry by Elathera
Mini Chocolate Pudding Cakes
Mini Chocolate Pudding Cakes with Whipped Cream and Raspberry
Adapted from Molten Chocolate Cake recipe from Tasty Kitchen

Makes 24 delicious teeny tiny cakes


Ingredients

Cake
  • 4 pieces (squares) Semi-sweet Baking Chocolate
  • ½ cups Butter
  • 1 cup Powdered Sugar
  • 2 whole Eggs
  • 2 whole Egg Yolks
  • 6 Tablespoons Flour
Toppings
  • 1 cup Real Whipping Cream
  • 1 Tablespoon Sugar
  • Fresh raspberries
  • Chocolate shavings to taste (grate some of the chocolate bar)

Directions
  1. Preheat oven to 425 degrees. Spray mini muffin cups generously with non-stick spray.
  2. Microwave chocolate and butter in large bowl on high for about 1 minute, until butter is melted. Whisk until chocolate is also melted.
  3. Stir in sugar until well blended. Whisk in eggs and egg yolks. Stir in flour.
  4. Divide between cups.  Bake 5 minutes until sides are firm and center is soft.
  5. Combine sugar and heavy cream and whip until stiff. Top with whipped cream and raspberry.  Garnish with chocolate shavings.  

Tuesday, July 23, 2013

Rydia Dress

And finally...Rydia's dress!  Even though this cosplay adventure started 6 months ago, it was not until one month before ConnectiCon that I started working on the dress.  I purposely waited as long as possible so it would fit my [new] frame (goal of 6-7% weight loss, plus building muscle tone).


This was my first experience making actual clothing and feel really, really good about how it turned out!  I made one alteration from Rydia's actual dress in order to hide the bra.  I wanted the bra to provide lift and support to give the illusion of more, and in order to do that I needed to maintain the integrity of the built in bra (i.e. keep the fabric/hook between the cups).  That's why it is not fully open at the breast area.  I used clear bra straps, which are hidden by the beaded straps that Rydia's cloak clasps onto.  You can see one of the straps in the photo below:

Rydia of Mist cosplay FF4 final fantasy iv custom dress bead straps built in bra by Elathera
Like all the other pieces of this costume, the dress was also custom design.  I created my own pattern from scratch by taking numerous measurements.  The fabric is a thin, stretchy knit, which allows room for movement and expansion.  There's also a hidden zipper built into the side---another new sewing adventure for me!

My crown achievement is the embroidery and beadwork, which took about 50 hours to complete.  The smaller design is made of an embroidered plus sign (+) with a diamond-shaped exterior and a single bead in the center.  The larger design is a combination of beadwork (both "jimmies" and round beads) to emphasize the highlights and embroidery to bring life to the shape as a whole.

Rydia cosplay FFIV Final Fantasy 4 custom dress beadwork by Elathera
  
What went well:
  1. Overall dress shape
  2. Built in bra
  3. Extensive beadwork and embroidery
  4. Decorative leather straps & gold eyelets
  5. Designed to take on/off without any assistance (woot!)
What could be improved:
  1. Less modesty!  I was a bit nervous over how revealing the dress is on the legs and hips.  I could probably take the bottom up another couple inches without feeling too terribly self conscious.  As for the sides, those should probably come up another couple inches as well.  However, I may run into issues as the top of the tights and my underwear line are *just* covered up at the current length.
  2. More boobs!  After sewing in the bra, I read some good tips online to create larger, fuller breasts.  If I had started a cup size or two higher than actual and used more padding, it would have looked like there was more.
  3. Stronger material for beaded straps.  I had a couple wardrobe malfunctions at CTCon when seated---the stress put on the straps when moving my shoulders caused the bead string to snap.  Originally, the straps had 4 strands of gold thread to hold it together.  Then, when I used extra strength Gutterman brand thread (2 strands), it still ended up snapping.  I'm open to suggestions on how to make this work.  A friend suggested I try fishing line, so I may give that a shot.  The holes in the beads are rather narrow, which may limit the types of materials I can try.